Clipping Tools
Clipping tools for assets:
Important
Clipping tools are session-specific and not saved with the asset. They're only visible while on this page and are lost upon reload. For persistent clipping, consider creating a Project to store them along with other details.
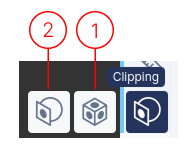
1. Clipping Box
Clicking a point on the asset places a cube that clips the asset to show only data inside. Adjust the cube's sides to include more or less of the asset.
2. Clipping Plane
First, choose how to create the clipping plane:
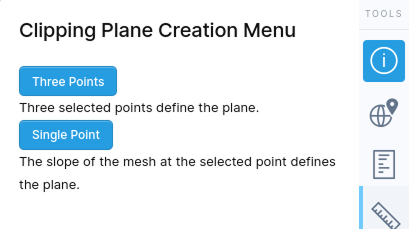
- Three Points: Click 3 points; a plane is fitted between them.
- Single Point: Click one point; the plane centers there and is parallel to local geometry.
After creating a clipping plane, you have these options:
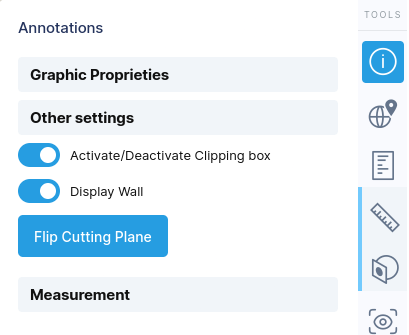
- Activate/Deactivate toggle: Controls whether clipping is active
- Display wall: Shows/hides the plane in 3D view
- Flip Cutting Plane: Switches which side of the model is clipped
Click and drag on the plane's surface to move it through space while maintaining orientation.
Important Limitations:
- Only one clipping box or multiple clipping planes can be visible at a time.
- With multiple boxes, only one can actively clip; others are deactivated.
- Activating a new clipping box deactivates all other clipping tools.